Setting Up Your Organization Profile & Settings
The Organization Profile & Settings section lets you configure your company’s core information, branding, integrations, and system preferences. These details are used across candidate communication, reports, and workflows.
1. Login to SpringVerify account
1. Login to SpringVerify account
2. From the top right, click on your name and Click Settings
Company Profile
This section captures your organization’s basic identity and branding details.
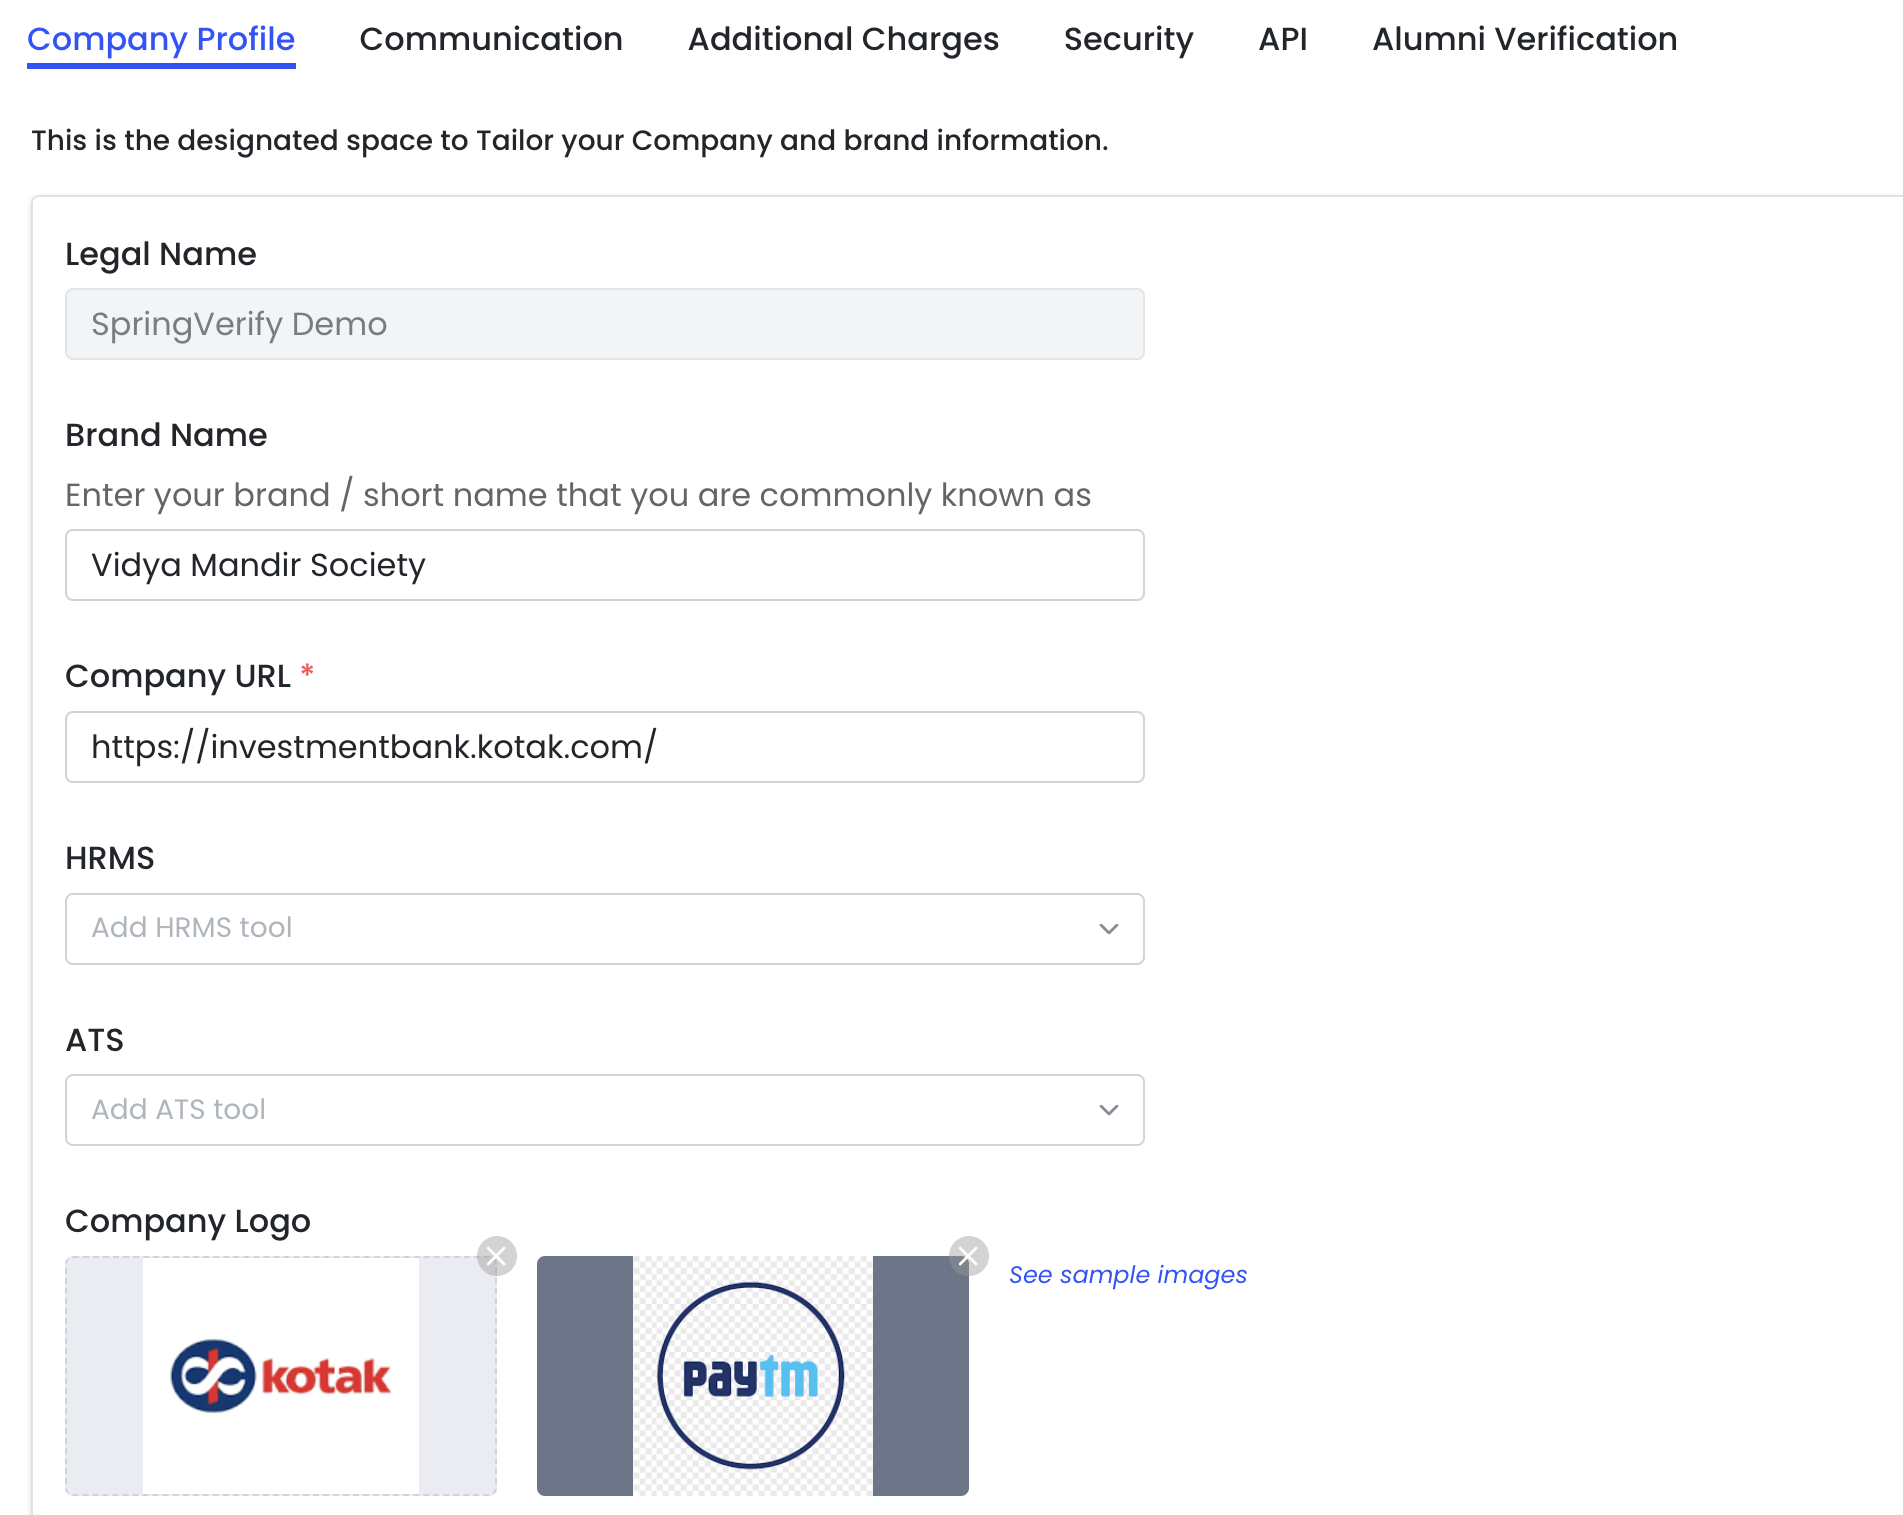
Legal Name
Enter your organization’s registered legal name.
- This name is used for compliance and official records.
- Example: SpringVerify Demo
Brand Name
Enter the brand or short name your organization is commonly known as.
- This name may appear in candidate-facing communication.
- Example: Vidya Mandir Society
Company URL
Add your organization’s official website URL.
- This is a mandatory field.
- Ensure the URL is valid and publicly accessible.
HRMS
Select the HRMS tool your organization uses.
- This helps with integrations and workflow alignment.
- If not applicable, this field can be left unselected.
ATS
Select the Applicant Tracking System (ATS) used by your team.
- Enables smoother candidate data flow where integrations are supported.
Company Logo
Upload your organization’s logo to personalize communication and reports.
Logo Guidelines
- Use a horizontal (landscape) logo for best results
- Preferred format: PNG or JPEG
- Transparent background recommended
- Ideal size: 600 × 200 px or similar ratio
Square logos are supported but may appear with side padding.
You can click See sample images to view recommended logo formats.
Communication
Customize the background check invitation and reminder emails sent to candidates so they align with your organization’s tone and requirements.
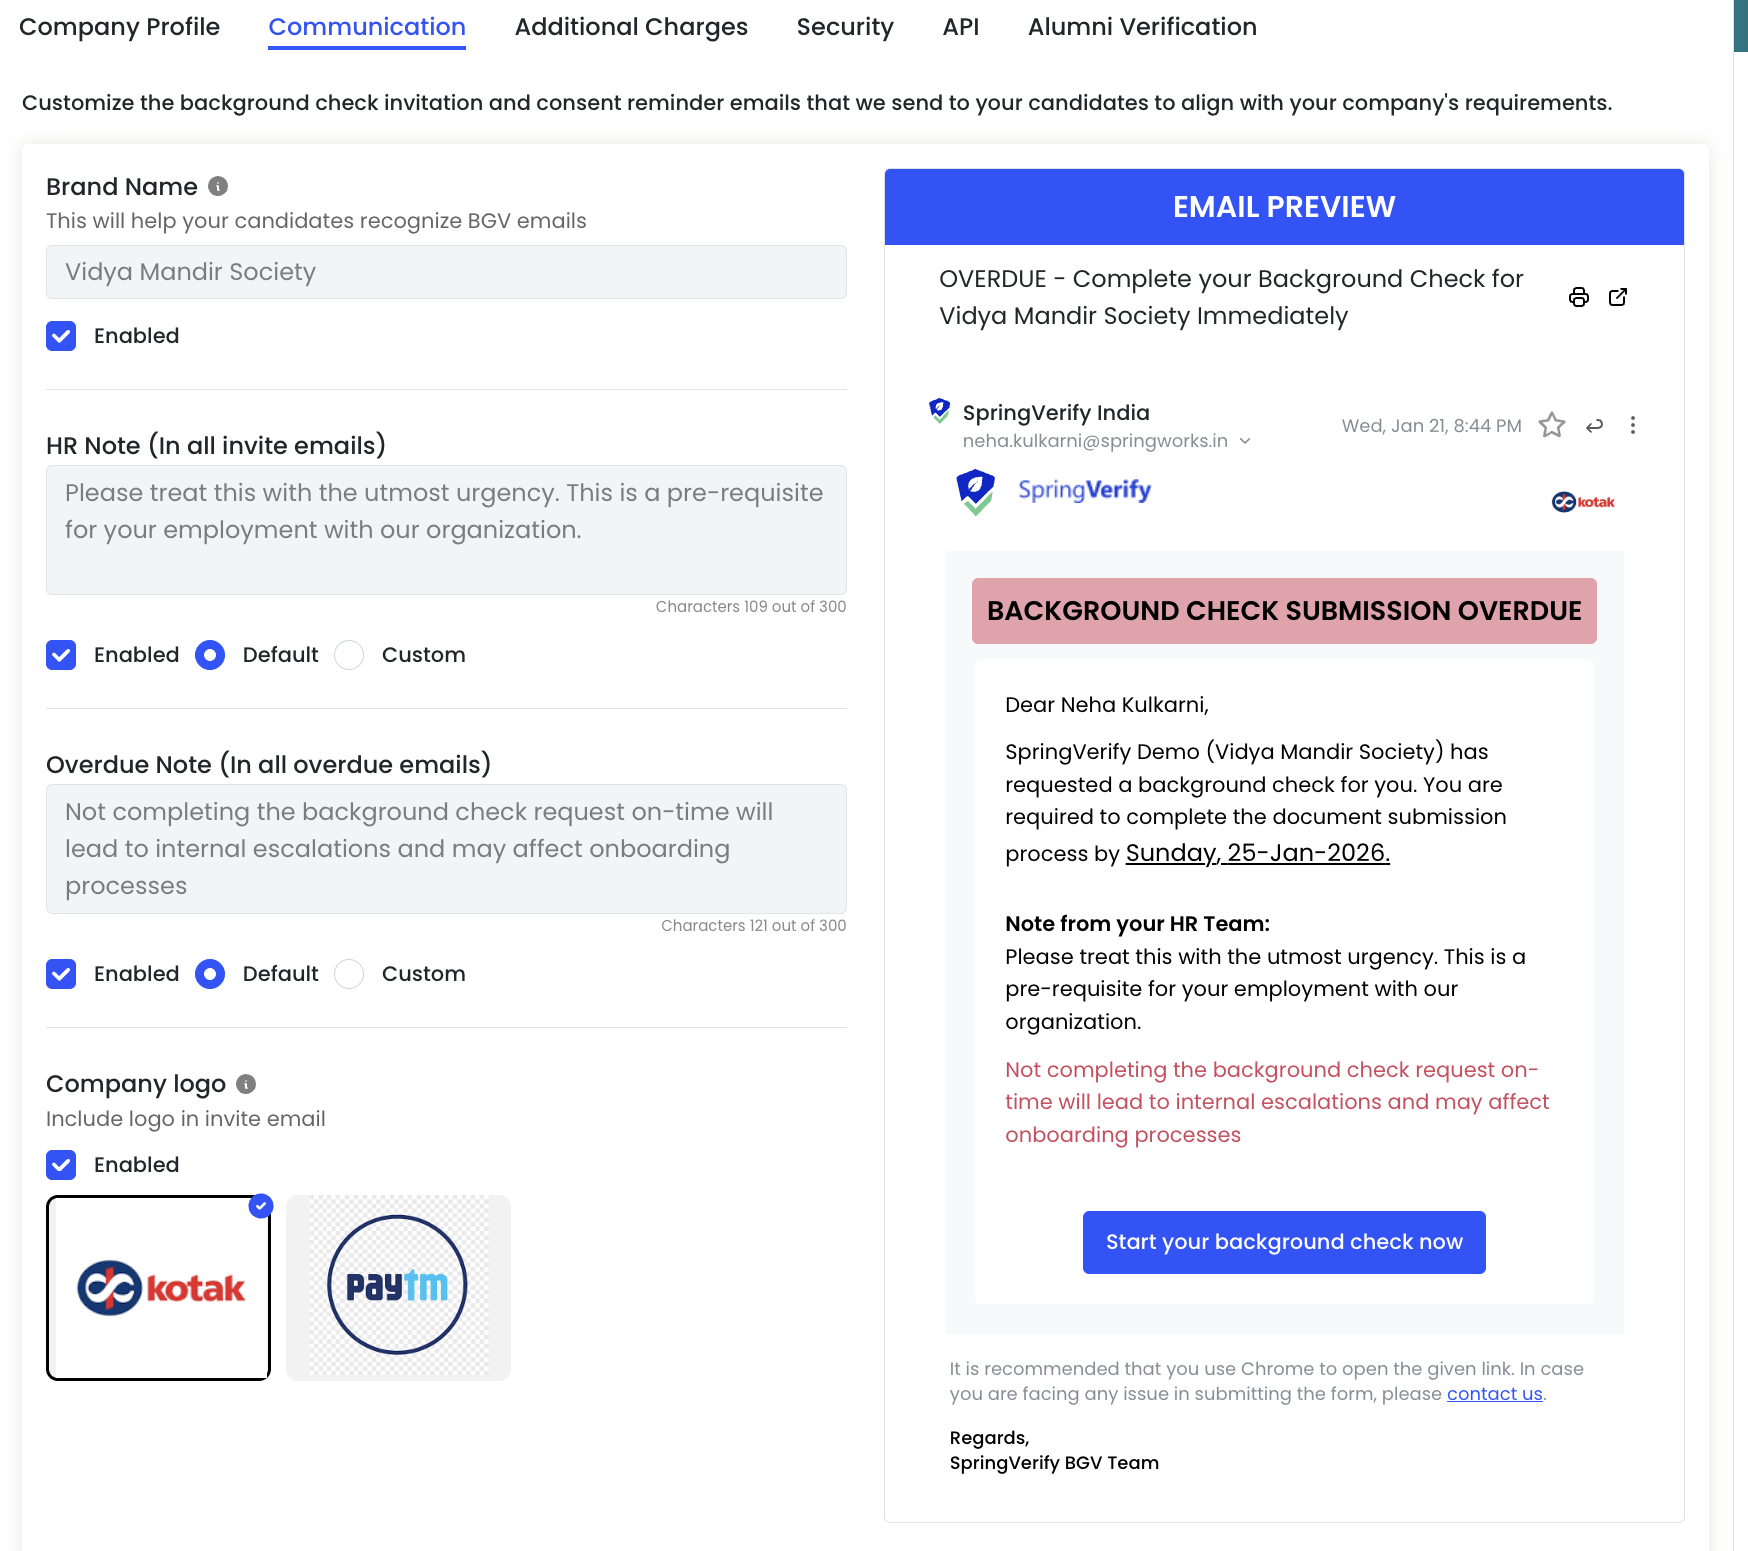
Brand Name (Email Identifier)
This brand name helps candidates easily recognize background verification emails.
- Auto-filled from your Company Profile
- Appears in email subject lines and content
- Recommended to keep this consistent with your employer brand
You can enable or disable the brand name display using the toggle.
HR Note (In all invite emails)
Add a note from your HR team that appears in all background check invitation emails.
- Used to explain urgency or set expectations
- Maximum limit: 300 characters
- Shown clearly in the email body under “Note from your HR Team”
Options:
- Enabled – Include the note in invite emails
- Default – Use the system-provided text
- Custom – Write your own message
Overdue Note (In all overdue emails)
This note is shown when candidates miss the background check submission deadline.
- Helps communicate consequences or next steps
- Maximum limit: 300 characters
- Displayed prominently in overdue reminder emails
Options:
- Enabled – Include overdue note
- Default – Use the standard system message
- Custom – Add your own escalation message
Company Logo in Emails
Choose whether to display your company logo in candidate-facing emails.
- Logo appears at the top of invitation and reminder emails
- Helps reinforce brand trust and recognition
Select the logo you want to use and enable the toggle to include it in emails.
Email Preview
The Email Preview panel shows a real-time preview of how emails will look to candidates.
- Updates instantly as you make changes
- Allows you to verify branding, notes, and tone before saving
Use this preview to ensure clarity and consistency before enabling communication settings.
Additional Charges
Configure approval settings for checks that may incur additional costs, helping you control spend while avoiding unnecessary verification delays.
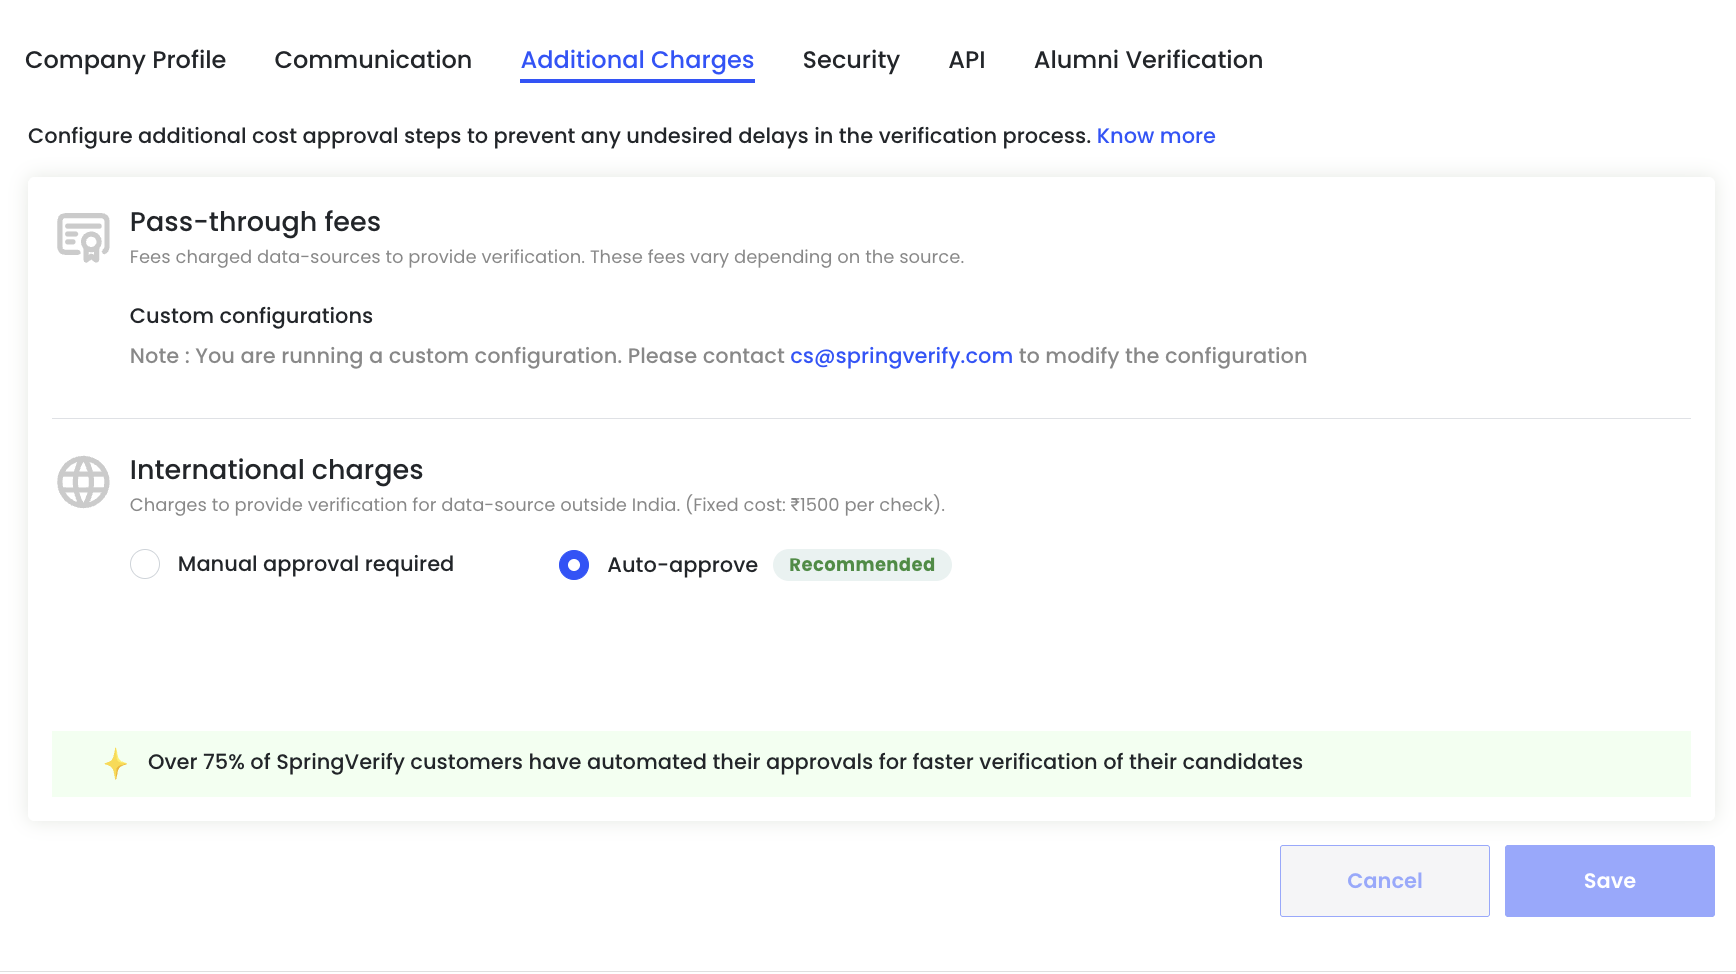
Pass-through Fees
Pass-through fees are charges applied by external data sources to complete certain verifications. These fees vary based on the source and type of check.
Custom Configurations
If your account is on a custom configuration, pass-through fee settings cannot be edited directly.
- A notification will indicate that you are running a custom setup
- To make changes, contact cs@springverify.com
This ensures pricing and approval logic remains aligned with your agreed configuration.
International Charges
International charges apply when verification is required from data sources outside India.
- Fixed cost per check (as applicable to your account)
- Designed to cover additional operational and data-access costs
Approval Options
You can choose how these charges are approved:
- Manual approval required
- Each international check requires explicit approval before proceeding
- Useful when tight cost control is needed
- Auto-approve (Recommended)
- International checks are approved automatically
- Prevents delays in verification timelines
- Preferred by most organizations for faster turnaround
Over 75% of SpringVerify customers use auto-approval to speed up candidate verification.
Security
Configure security controls to protect your organization’s data and restrict unauthorized access to the portal.
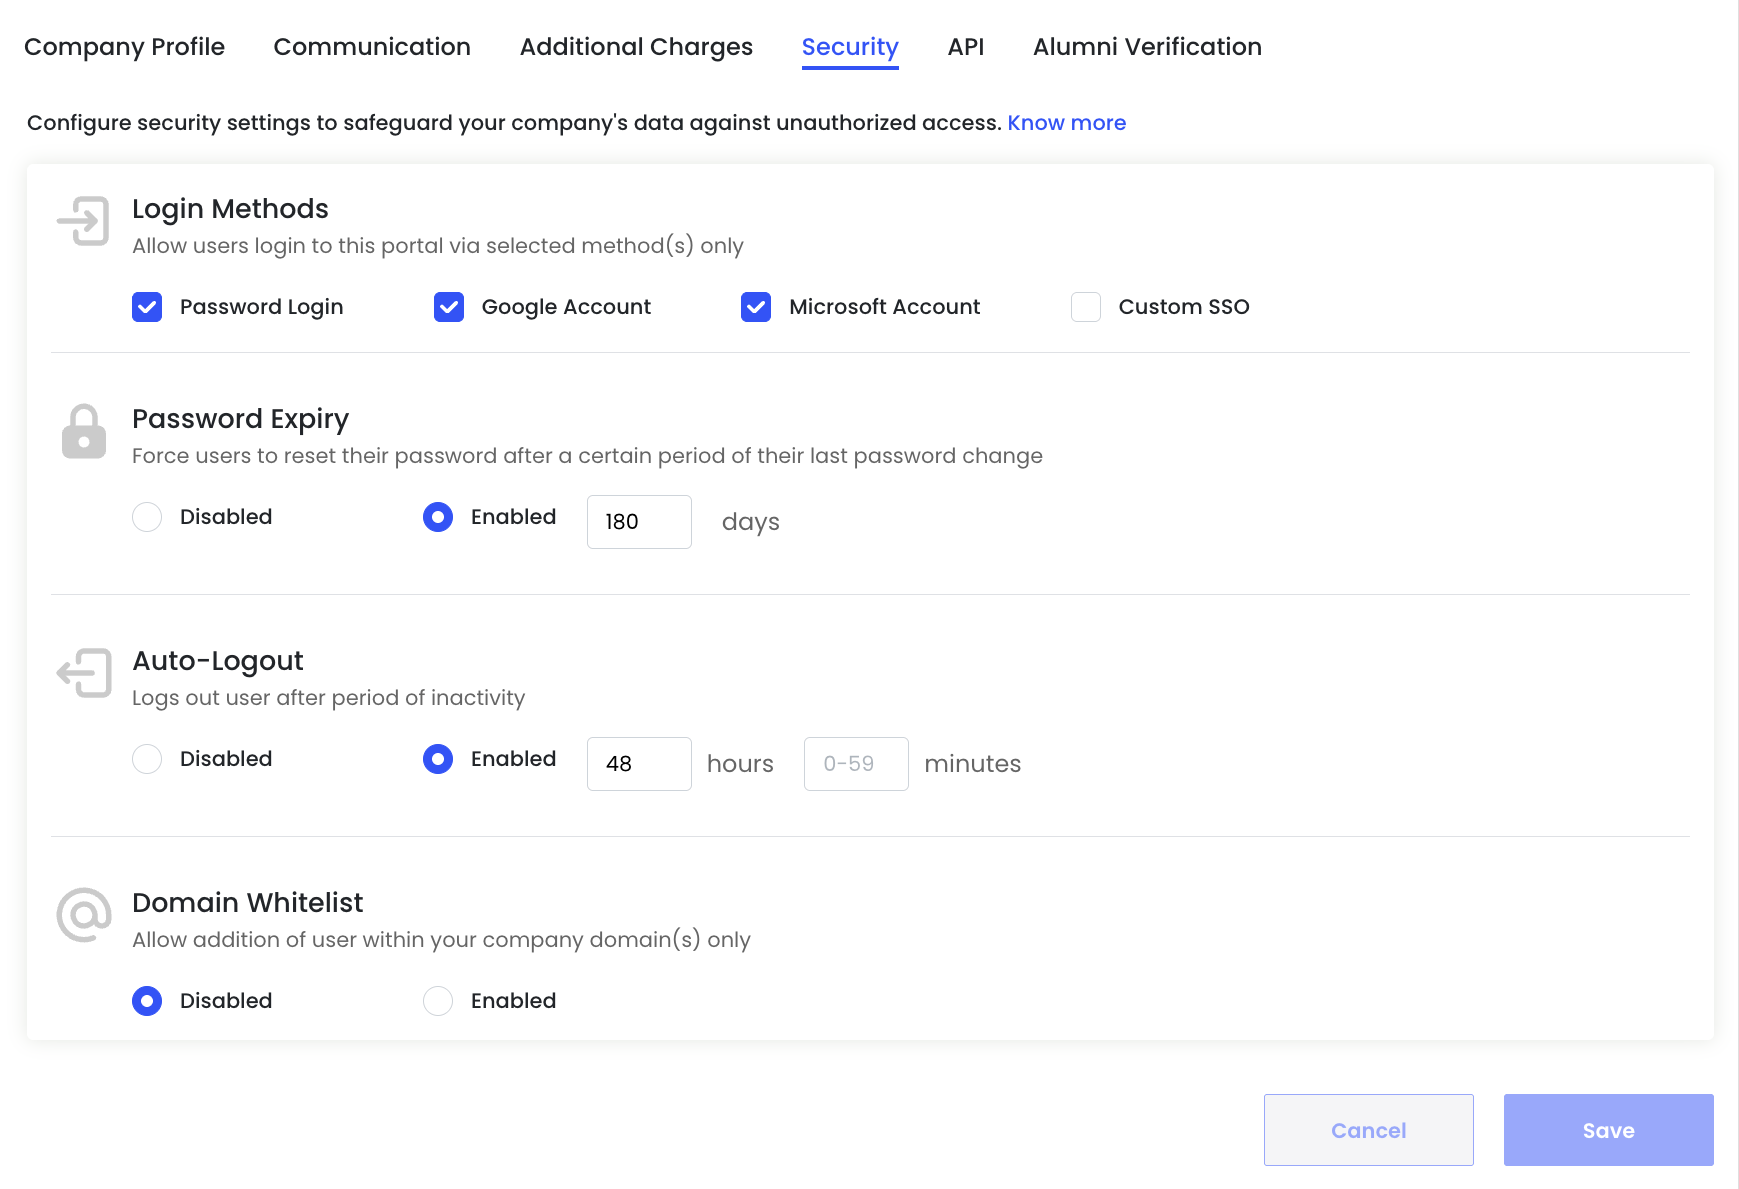
Login Methods
Choose how users are allowed to log in to your SpringVerify account.
You can enable one or more of the following options:
- Password Login – Standard email and password authentication
- Google Account – Sign in using Google credentials
- Microsoft Account – Sign in using Microsoft credentials
- Custom SSO – Enterprise SSO setup (available on request)
Only the selected login methods will be available to users.
Password Expiry
Force users to reset their password after a defined period.
Options:
- Disabled – Passwords never expire
- Enabled – Users must reset their password after the specified number of days
Example: Setting password expiry to 180 days improves account security and aligns with common IT policies.
Auto-Logout
Automatically logs users out after a period of inactivity.
Options:
- Disabled – Users remain logged in until they manually log out
- Enabled – Users are logged out after a defined inactivity duration
You can configure:
- Hours
- Minutes (0–59)
Auto-logout is recommended for shared systems and high-security environments.
Domain Whitelist
Restrict user access to specific email domains.
Options:
- Disabled – Users from any domain can be added
- Enabled – Only users with approved company domain(s) can be added
This setting helps ensure only authorized users from your organization can access the account.
API
Generate and manage API tokens to integrate SpringVerify with your internal systems, ATS, or HR platforms.
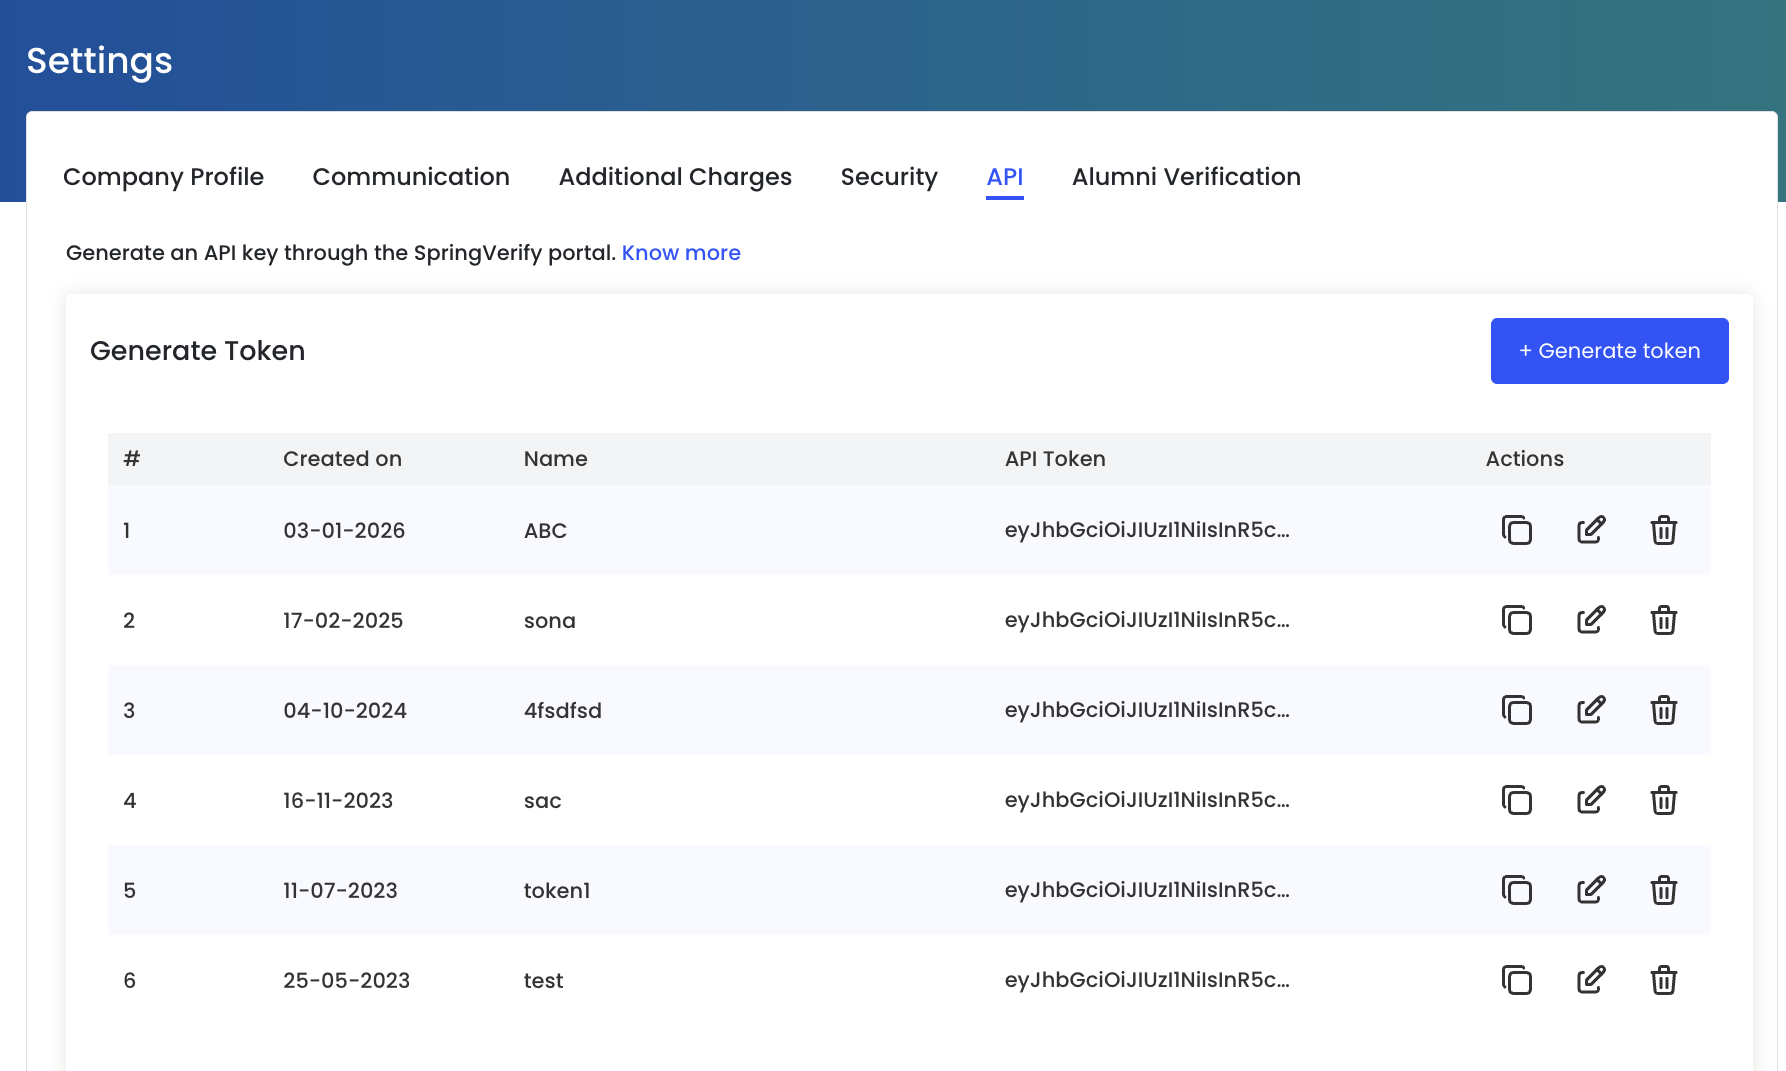
Generate API Token
API tokens allow secure system-to-system communication with SpringVerify.
To generate a new token:
- Click + Generate token
- Provide a meaningful name to identify the token’s purpose (e.g. ATS Integration, HRMS Sync)
Once generated, the token will appear in the list with its creation date.
API Token List
All generated tokens are listed with the following details:
- Created on – Date when the token was generated
- Name – Identifier to help you recognize the integration
- API Token – Secure token value (partially masked)
Token Actions
Each API token supports the following actions:
- Copy – Copy the token securely for use in your system
- Edit – Rename the token to better reflect its usage
- Delete – Revoke the token to immediately stop API access
Deleting a token will break any integration using it.
Security Best Practices
- Treat API tokens like passwords
- Share tokens only with trusted systems
- Delete unused or outdated tokens regularly
- Use separate tokens for different integrations
Alumni Verification
Customize the look and feel of the alumni verification request page so it aligns with your organization’s brand and is easily recognizable to former employees.
Related Articles
Pre-Offer BGV Setup Guide | Darwinbox & SpringVerify Integration
Overview This guide helps you set up and use Pre-Offer Background Verification with SpringVerify directly from your Darwinbox Recruitment module. With this integration, you can initiate background checks on candidates before making an offer—all ...A Guide to ‘Security Settings’ on SpringVerify
What are the ‘Security Settings’ features on SpringVerify? ‘Security Settings’ features are the second layer authentication mechanism available to SpringVerify customers to improve protection against threats to the access and usage of ...SpringVerify India - APIs Documentation
Introduction Welcome to SpringVerify India API Documentation. The endpoints exposed in this documentation are to initiate background verification of a candidate and query the verification report. The SpringVerify India API is organized around REST. ...Integration of SpringVerify with Recruitee
Overview: This guide provides step-by-step instructions for integrating SpringVerify with Recruitee, allowing you to perform background checks on candidates within the Recruitee platform. Prerequisites: Access to the SpringVerify Access to the ...Additional Cost Settings
What is an additional cost? Additional costs are the charges that either a university or the ex-employer charges SpringVerify to provide us with the candidate’s data. These additional costs will get Charged by the universities and companies who hire ...